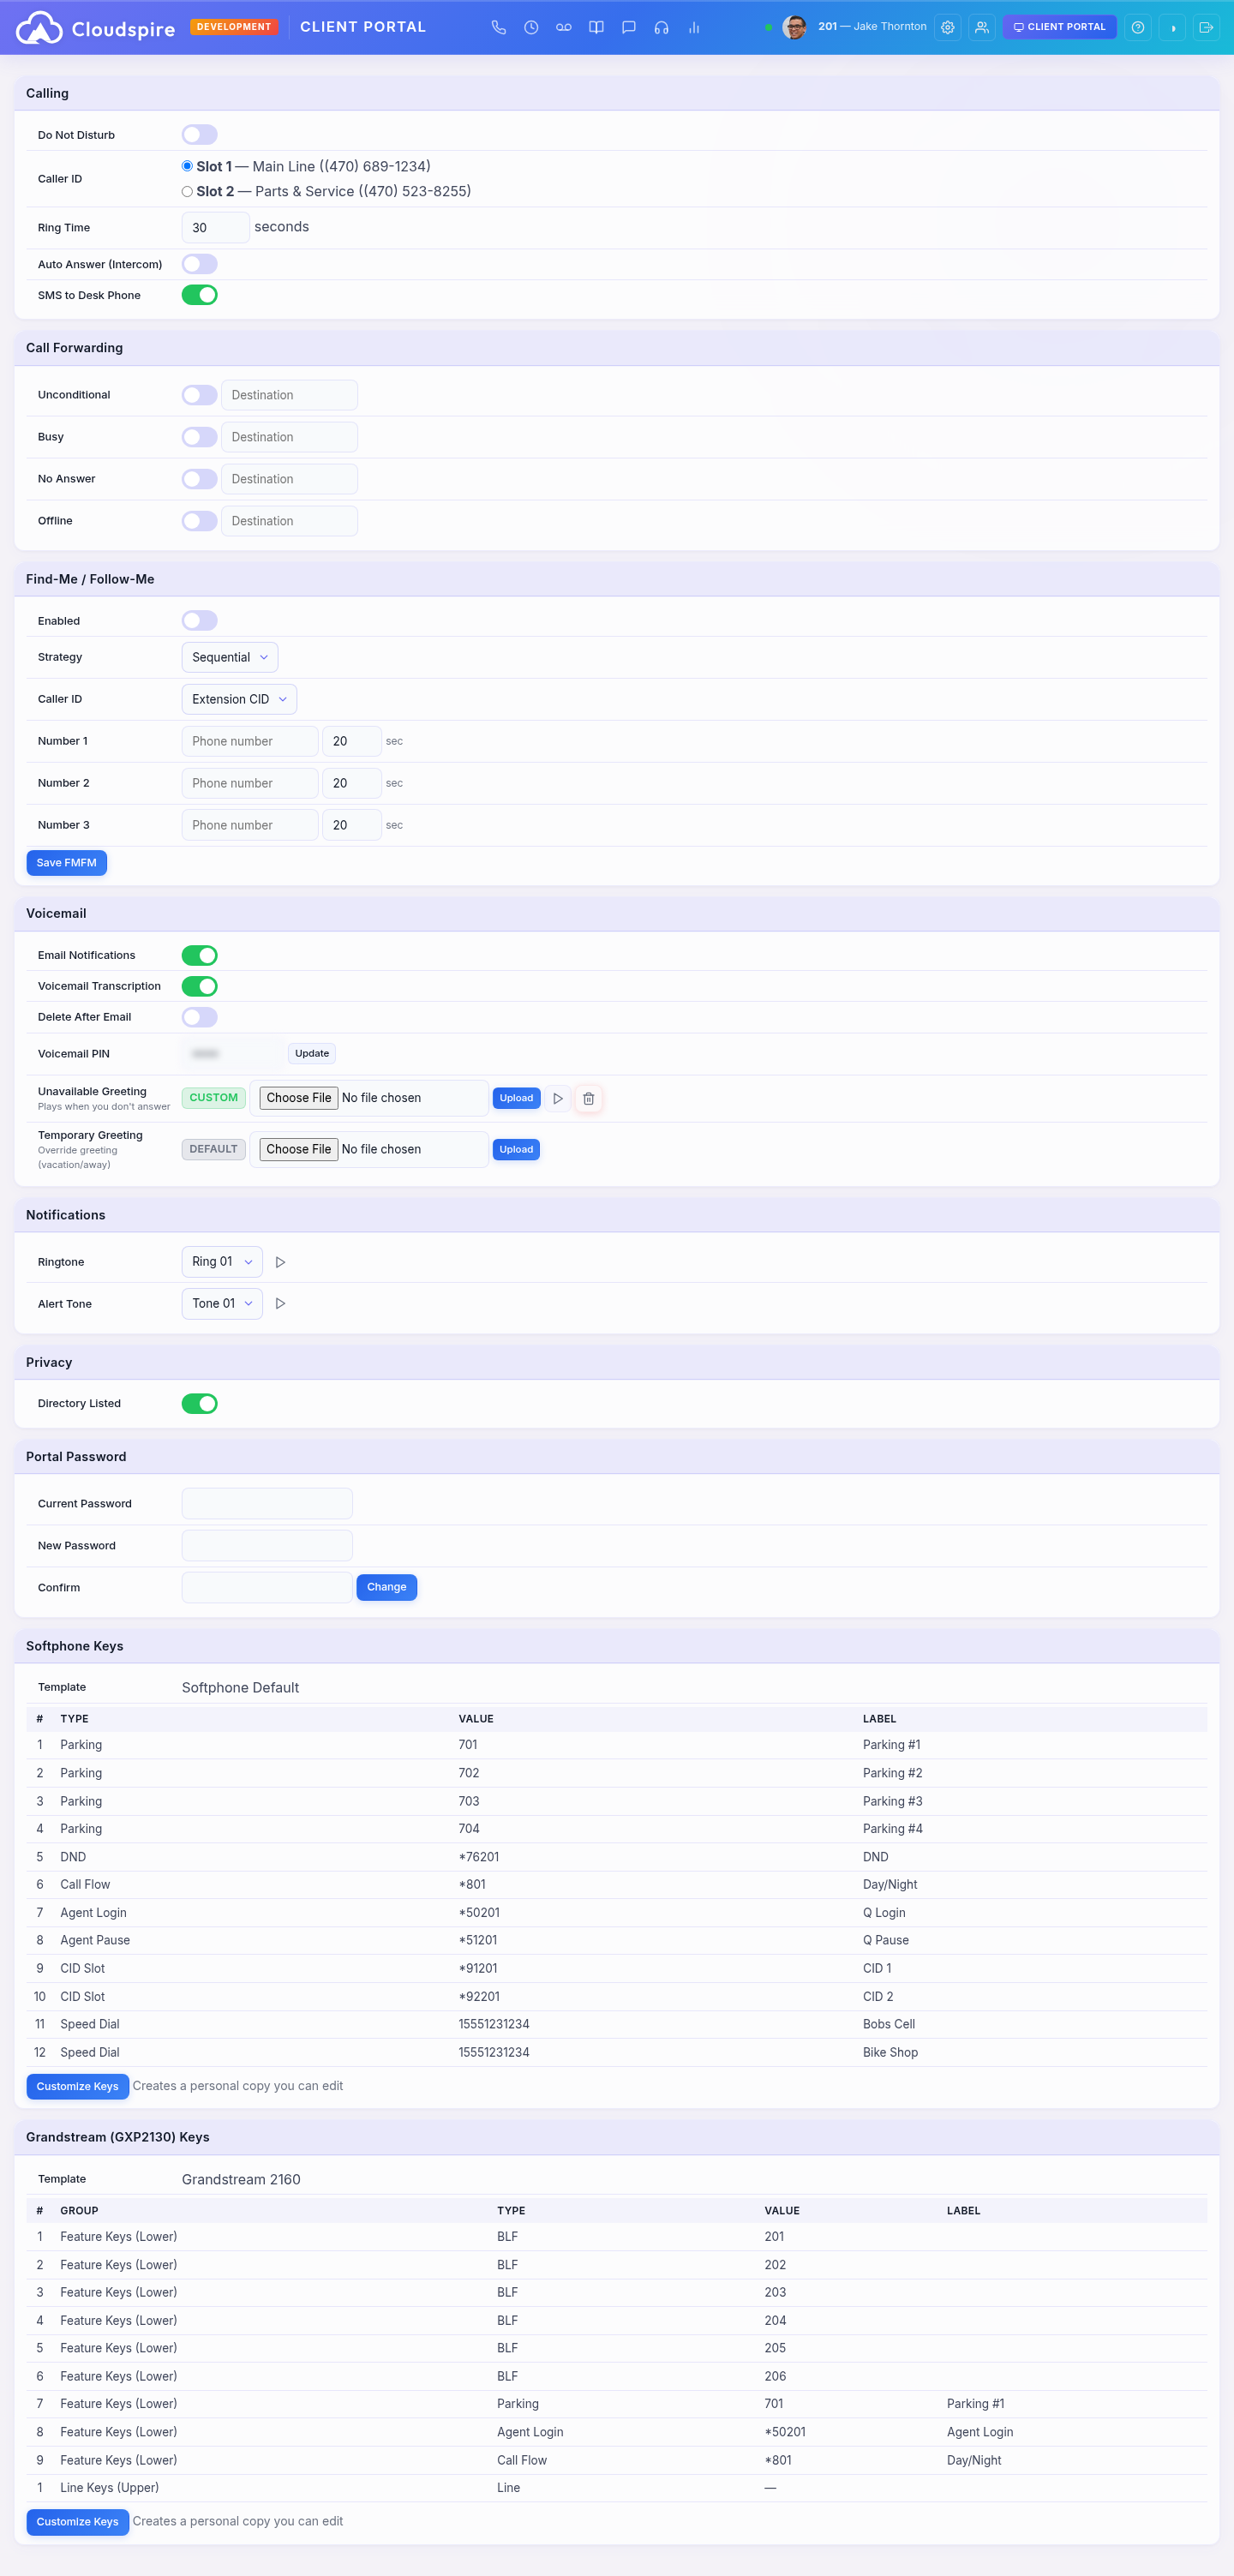
Settings
The Settings tab lets you configure your extension's call handling, voicemail, notifications, privacy, BLF keys, and your portal password. Settings are organized into sections and changes take effect immediately.
Opening Settings
There is no cog-wheel icon on the portal. To open your settings, click your name and extension at the top-right of the portal — the small chevron (▾) next to it opens a dropdown with Profile, Settings, and Sign Out. Click Settings to open the tab.
Click your name/extension in the top-right to reveal Profile, Settings, and Sign Out
On mobile, tap the overflow (…) menu to access the same items.
Routing Status Badges
The portal header shows badges for any call-routing feature that is currently intercepting your inbound calls, so you always know what is on without having to open Settings:

Header badges surface DND, Call Forwarding, Find Me / Follow Me, and admin-managed Failover Destinations
| Badge | Meaning | Click behavior |
|---|---|---|
| DND | Do Not Disturb is on; your devices will not ring. | One click turns DND off. |
| Forwarding | Unconditional Call Forwarding is sending all your calls to another number. | Opens the Settings tab to manage. |
| Find Me | Find Me / Follow Me is on and ringing additional numbers. | Opens the Settings tab to manage. |
| Quiet Hours | You have a Quiet Hours schedule turned on, which switches Do Not Disturb on and off automatically. This badge tells you a schedule exists; the DND badge tells you whether DND is on right now. | Opens the Settings tab to manage. |
| Failover | Your administrator has configured one or more failover destinations (busy / no-answer / offline / unconditional). | Informational only — admin-managed. Hover for the full per-condition list. |
Hover any badge to see the full destination details. Badges are hidden when nothing is configured for that feature.
Calling
The Calling section groups your core call-handling preferences.
Do Not Disturb (DND)
Toggle Do Not Disturb to prevent calls from ringing your extension. When DND is enabled:
- Incoming calls go directly to voicemail (or the configured no-answer destination)
- Your desk phone and softphone will not ring
- You can still make outbound calls
Important: This toggle controls system-wide DND, which syncs across all your devices (desk phone, softphone, mobile app). It is different from the built-in DND button found on most desk phones — that button only silences the local ringer and does not inform the phone system. Always use this portal toggle, a programmed BLF key, or the *76 feature code to ensure DND is recognized across all devices.
Quiet Hours (DND schedule)
The Settings tab has a Quiet Hours card that automatically turns Do Not Disturb on and off on a weekly schedule. Useful for after-hours coverage, lunch breaks, or recurring meetings without having to remember to dial *78 / *79 each time.
- Schedule enabled — master toggle. When off, manual DND is fully in your control.
- Time zone — quiet-hours windows are evaluated in this zone. Defaults to your company's time zone; useful to override when working from a different region.
- Windows — one or more day-of-week + start-time + end-time entries describing when DND should be automatically on. Outside any window, your normal DND state applies.
Manual override: while the schedule is enabled, dialing *78 (DND on) or *79 (DND off) inside an active quiet-hours window has only a temporary effect — the schedule re-asserts within a minute. To pause the schedule, turn off the Schedule enabled toggle.
Overnight windows: a window where the end time is earlier than the start time (e.g. 20:00–08:00) wraps midnight and covers both halves on the listed day(s).
Caller ID
If your extension has multiple caller ID numbers (CID slots) assigned by your administrator, you can select which one is used for outbound calls. Each slot shows a label and phone number. The change takes effect immediately for your next outbound call.
Ring Time
Ring Time controls how many seconds your phone rings before the call moves to the next destination (voicemail, call forwarding, etc.).
- Range: 10–120 seconds
- Default: 30 seconds
A typical phone ring cycle is approximately 6 seconds. At the default of 30 seconds, your phone rings about 5 times before the call is routed.
Auto Answer (Intercom)
When Auto Answer is enabled, intercom calls (using the *80 feature code) will automatically answer on speakerphone. This is commonly used in office environments where colleagues need to reach you quickly without waiting for you to pick up.
SMS to Desk Phone
When enabled, incoming text messages are pushed to your desk phone’s screen so you can read them without opening the portal. Enabled by default; supported on most desk phone models.
Call Forwarding
Call forwarding redirects calls to another number or extension under specific conditions:
| Type | When It Activates |
|---|---|
| Unconditional | All incoming calls are forwarded immediately, regardless of your phone's state. Your phone does not ring. |
| Busy | Calls are forwarded when your extension is busy (already on a call). |
| No Answer | Calls are forwarded when you don't answer within the ring time. |
| Offline | Calls are forwarded when your extension is not registered (phone unplugged, softphone disconnected). |
For each forwarding type, toggle it on and enter the destination number. You can enable multiple types simultaneously — for example, forward busy calls to your mobile while forwarding no-answer calls to voicemail.
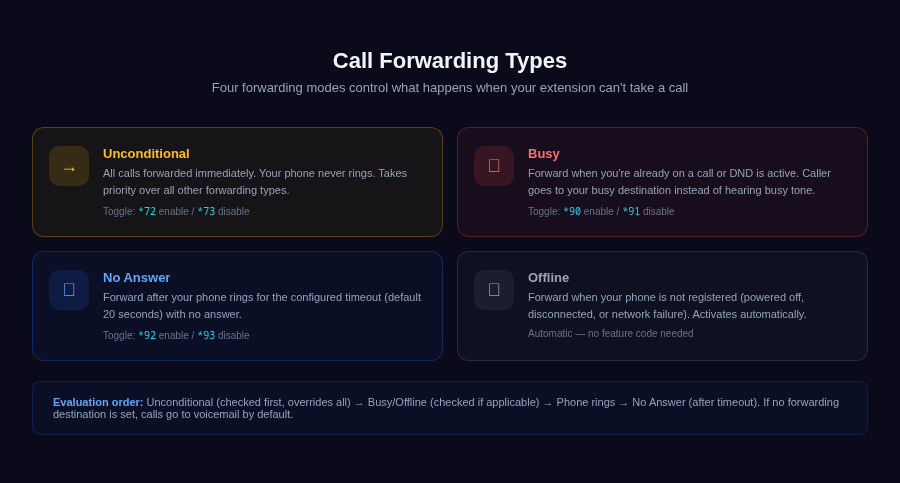
Four forwarding modes: Unconditional (always), Busy (already on a call), No Answer (after timeout), Offline (phone disconnected)
Find Me / Follow Me
Find Me/Follow Me (FMFM) lets you ring multiple phone numbers when a call comes in, so you can be reached on your desk phone, mobile, or other numbers.
Options
| Setting | Options | Description |
|---|---|---|
| Enable | On / Off | Activates or deactivates Find Me/Follow Me. |
| Strategy | Simultaneous / Sequential | Simultaneous rings all numbers at once. Sequential tries each number in order, waiting for the timeout before moving to the next. |
| Caller ID | Extension / Passthrough | Extension shows your extension's caller ID on the forwarded call. Passthrough shows the original caller's number. |
Numbers
You can configure up to 3 external numbers with individual ring timeouts (5–120 seconds):
- Number 1 — Primary follow-me number (e.g., your mobile phone)
- Number 2 — Secondary number
- Number 3 — Tertiary number
In sequential mode, the system tries Number 1 first, then Number 2, then Number 3. In simultaneous mode, all configured numbers ring at the same time along with your extension.
To avoid this: switch to Sequential with your softphone first, raise your cell carrier’s voicemail timeout to 25+ seconds, or skip the cell number entirely.
Voicemail
The Voicemail section manages email notifications, transcription, your voicemail PIN, and greetings.
Email Notifications
When enabled, new voicemail messages are sent to your email address as an attachment. Your administrator configures the email address on your extension.
Voicemail Transcription
When enabled, voicemail messages are automatically transcribed using AI and the text is included in the email notification and displayed in the Voicemail tab.
Delete After Email
This toggle is only available when Email Notifications is turned on — it is grayed out if email is disabled.
Note: This setting does not currently remove any messages. Whether it is on or off, your voicemails are emailed to you and stay in the Voicemail tab, where they remain until the retention period for your account elapses. Use the Delete button in the Voicemail tab to remove a message yourself.
Voicemail PIN
Your voicemail PIN is used to access voicemail from a phone (by dialing the voicemail feature code). Enter a new numeric PIN (4–8 digits) and click Update. This PIN is separate from your portal login password.
Voicemail Greetings
Two greeting types are available:
| Greeting | When It Plays | Use Case |
|---|---|---|
| Unavailable Greeting | When you don't answer a call and it goes to voicemail | Your standard personal greeting |
| Temporary Greeting | Overrides the unavailable greeting when set | Vacation, out of office, or temporary notices |
Each greeting shows its current status: Custom (green) if you have uploaded one, or Default (gray) if using the system default.
For each greeting you can:
- Upload — Select a WAV or MP3 file (max 10 MB) and click Upload. The system converts it to the correct format automatically.
- Play — Click the play button to hear your current custom greeting through the browser.
- Delete — Click the delete button to remove your custom greeting and revert to the system default.
Tip: Use the temporary greeting when you're out of office. It overrides your unavailable greeting without replacing it. Delete the temporary greeting when you return to restore your normal greeting.
Auto-Expiration
When you upload a temporary greeting, you can set an auto-expiration date and time. The greeting will be automatically removed at the scheduled time, and your unavailable greeting will resume playing.
This is useful for vacation or holiday greetings — set it before you leave and it will be gone when you return, with no action needed on your part.
Use the date and time picker in the Auto-Expire row to set or clear the expiration. If no expiration is set, the temporary greeting stays active until you manually delete it.
Notifications
The Notifications section lets you choose the sounds your softphone uses for incoming calls and messages.
Ringtone
Select from the available ringtones using the dropdown. Click the play button next to the dropdown to preview the selected tone before saving. The change applies to the browser softphone immediately — your next incoming call will use the new ringtone.
Alert Tone
The alert tone plays when you receive a new message. Select a tone from the dropdown and use the play button to preview it. Like the ringtone, this change takes effect immediately.
Mobile Push Notifications
The Mobile Push Notifications card controls which alerts are pushed to the Cloudspire Voice app on your phone. Each type has its own toggle:
| Toggle | What It Pushes |
|---|---|
| SMS Messages | A push notification when a text message arrives. |
| Chat Messages | A push notification for internal team chat and group messages. |
| Voicemail | A push notification when a new voicemail is left for you. |
Do Not Disturb overrides all three. While DND is on, no messaging pushes are delivered to your phone, whatever these toggles are set to.
Privacy
Directory Listed
When enabled, your extension appears in the company directory visible to other users in the portal's dial screen. When disabled, your extension is hidden from the directory — other users will not see your name and number in their extension list.
Disabling directory listing does not prevent other users from calling your extension directly if they know the number.
Mobile App
The Mobile App section lets you generate a QR code to set up the Cloudspire Voice app on your iPhone. Instead of manually entering your server, tenant code, extension number, and password, you simply scan the QR code and the app is instantly configured and authenticated.
Get the app:

Generate a QR code and scan it with the Cloudspire Voice app to connect your phone
Setting Up the App
- Click Generate QR Code in the Mobile App section
- A QR code appears with a countdown timer showing the remaining time (tokens are valid for 24 hours)
- Open the Cloudspire Voice app on your iPhone and tap Scan QR Code
- Point your camera at the QR code — the app authenticates automatically
Important
- Each QR code can only be scanned once.
- QR codes expire after 24 hours. The countdown shows the actual remaining time — pressing Generate QR Code again returns the same code with its real remaining time, not a fresh 24-hour clock. The same 24-hour lifetime applies whether the code comes from this page, your administrator's portal, or the welcome email you received when your extension was created.
- Click Refresh to explicitly replace your current code with a new one. Refresh cancels the previous code immediately — use it if you want to invalidate a code you've shared or printed.
- Your password is never included in the QR code — it uses a secure one-time token
- The app connects to the correct server automatically based on the QR code
Tip: Your administrator can also generate a QR code for you from the admin portal if you don't have portal access on a computer.
Portal Password
To change your portal login password:
- Enter your current password
- Enter and confirm your new password (minimum 8 characters)
- Click Change
Password changes apply to both the voice portal and the client (CRM) portal if you have access to both — a single password works everywhere. See Login & Account for more details about password management.
Profile (Photo, Name, Email, Password)
Click Profile in the user dropdown at the top-right of the portal (or Profile in the mobile overflow menu) to open the unified profile editor. This is a single page where you can manage everything about your identity in one place.
- Profile photo: Click the round photo area or the camera overlay to upload a JPEG, PNG, GIF, or WebP image under 2 MB. The image is automatically cropped to a 200×200 square and stored once — it appears in the presence sidebar, call history, CRM contact views, and admin extension lists. If you also have access to the client portal, the same photo appears there too.
- Display name: Click the pencil icon next to your name, edit inline, and save. The new name immediately shows up on calls, in the presence sidebar, and (for client-portal users) in the CRM contact record — all from one save.
- Email: Click the pencil icon next to your email, enter a new address, and click the checkmark. We send a verification link to the new address. Click that link within 30 minutes to complete the change. If you lose the email or run out of time, just request a new link. Because your email is your login, this two-step flow prevents accidental lockouts.
- Password: Change or set your password from the same page using the Change Password card.
Email-change safeguards: An email change is rejected if the new address is already in use by another customer.
Passkeys (Security)
Passkeys are managed in the Passkeys (Security) card inside Profile. A passkey is a phishing-resistant credential stored in your device or password manager (Touch ID, Face ID, Windows Hello, security key, iCloud Keychain, 1Password, etc.) — it replaces typing your password.
- Enroll a passkey: sign in normally first, then open Profile and scroll to Passkeys (Security), optionally label the passkey (for example, "MacBook" or "iPhone"), and click Add a passkey for this device. Confirm with your device's authenticator.
- Sign in with a passkey: the login page shows a Sign in with a passkey button on any browser that supports passkeys. Click it; passwords remain available as a fallback at any time.
- Multiple passkeys: enroll passkeys on multiple devices (and on a cloud-synced password manager) so a lost or replaced device doesn't lock you out. You can also revoke any passkey from the same card at any time.
Two-Step Verification
Your Profile also has a Two-Step Verification card, where you can turn on an authenticator app (Google Authenticator, 1Password, Authy, and similar) as a second factor for sign-in — no administrator needed.
- Turn it on: click Enable, scan the code shown with your authenticator app, then enter the 6-digit code it displays and click Verify & turn on.
- Backup codes: click Generate backup codes and keep them somewhere safe — they get you back in if you lose your authenticator.
- Turn it off: use Turn off two-step verification on the same card.
The same passkey infrastructure (with separate enrollment per portal) is also available on the admin portal and the CRM client portal.
Chrome installed app (PWA) limitation: if you’ve installed the portal as a Chrome desktop app, the installed window cannot read the operating system’s passkey store (Windows Hello, iCloud Keychain) directly — this is a Chrome platform limitation outside of Cloudspire’s control. A local passkey you enrolled in the browser will not appear inside the installed app. The workaround is to use your phone: click Sign in with a passkey, scan the QR code Chrome displays, and approve the sign-in on your phone. Or sign in with your password from inside the installed app. See Login → Passkeys inside the Chrome installed app for the full walkthrough.
Cellular Callback (Read-Only Mobile Number)
If your administrator has set a Mobile Number on your extension and your tenant has Cellular Callback enabled, your Profile shows your mobile number in a read-only field labeled Cellular Callback Number. You cannot edit this number from the portal — only an administrator can. The mobile number is used by the iOS app to ring your cell when you place a call via the keypad's Cell dial mode; the app silently confirms you’re in the calling flow and the call bridges directly to the destination through the company trunk with no press-1 step needed in the normal case. If the app cannot confirm in time, a fallback prompt asks you to press 1 to connect (interruptible — the press is accepted the moment you touch the dial pad). Outbound caller ID is your business number.
BLF Keys
If your administrator has assigned a BLF (Busy Lamp Field) template to your phone, you can view and customize your BLF keys from the Settings tab. BLF keys appear as programmable buttons on your desk phone or softphone and are typically used for speed dials, presence monitoring, or parking.
Default Template (Read-Only)
By default, your keys are inherited from the system template set by your administrator. You can view the current key assignments in a read-only table showing each key's position, type, label, and value.
Customizing Your Keys
To personalize your BLF keys:
- Click Customize Keys to create a personal copy of the template
- Once customized, you can edit each key's type, label, and value
- Use + Add Key to add new keys
- Drag rows to reorder keys
- Click Save Keys to apply your changes
A Customized badge indicates you have a personal copy. Your customizations are applied the next time your phone downloads its configuration.
Resetting to Default
Click Reset to Default to discard your customizations and revert to the system template. This cannot be undone.